Voicemail Access and how to setup
Voicemail access - Dial *97 (this can pre-programed in your IP Phone under voicemail access or voicemail setting.
(PS. Phones that are Auto Provisioned by our server are programed to access the Voicemail. On the Phone you have a button for Voicemail (VM)
You can now move to step 1
To setup you Voicemail online in the CloudPBX:
1. Goto SERVICE - EXTENSION
There you will see all extensions
Scroll on one of the 3 icons (middle) on the left of the extension and choose and click on UPDATE you want to add voicemail
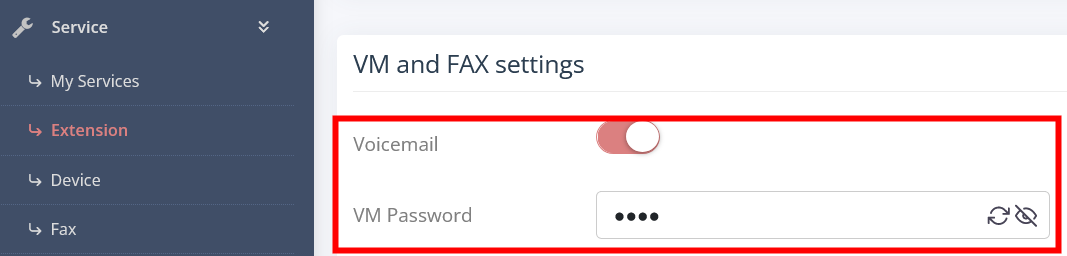
Scroll dowm the page to VM and FAX settings
Activate Voicemail and enter a password
Click on UPDATE
Now that you have a voicemail allocated to the extension we need to setup what the voicemail does and how it behaves.
2. Goto SERVICE - EXTENSION
Scroll on one of the 3 icons on the left of the extension and choose LOGIN AS EXTENSION

A new window will open
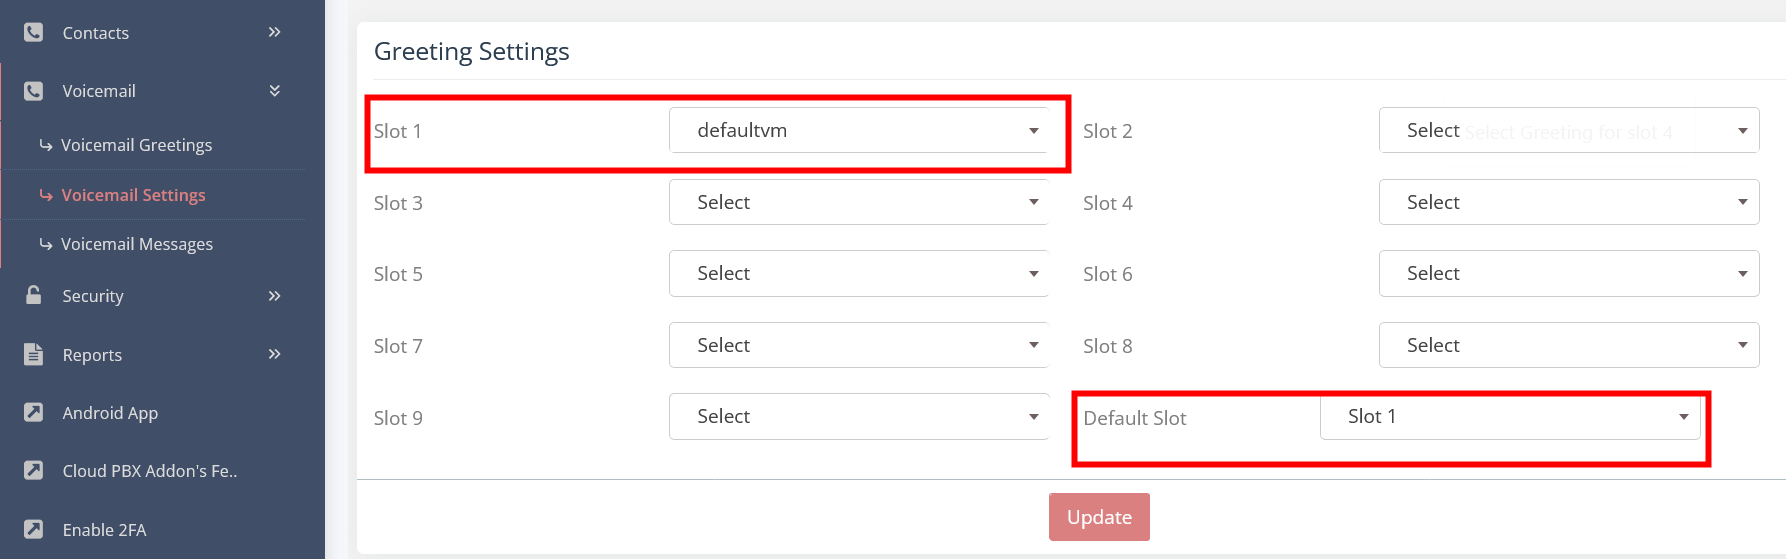
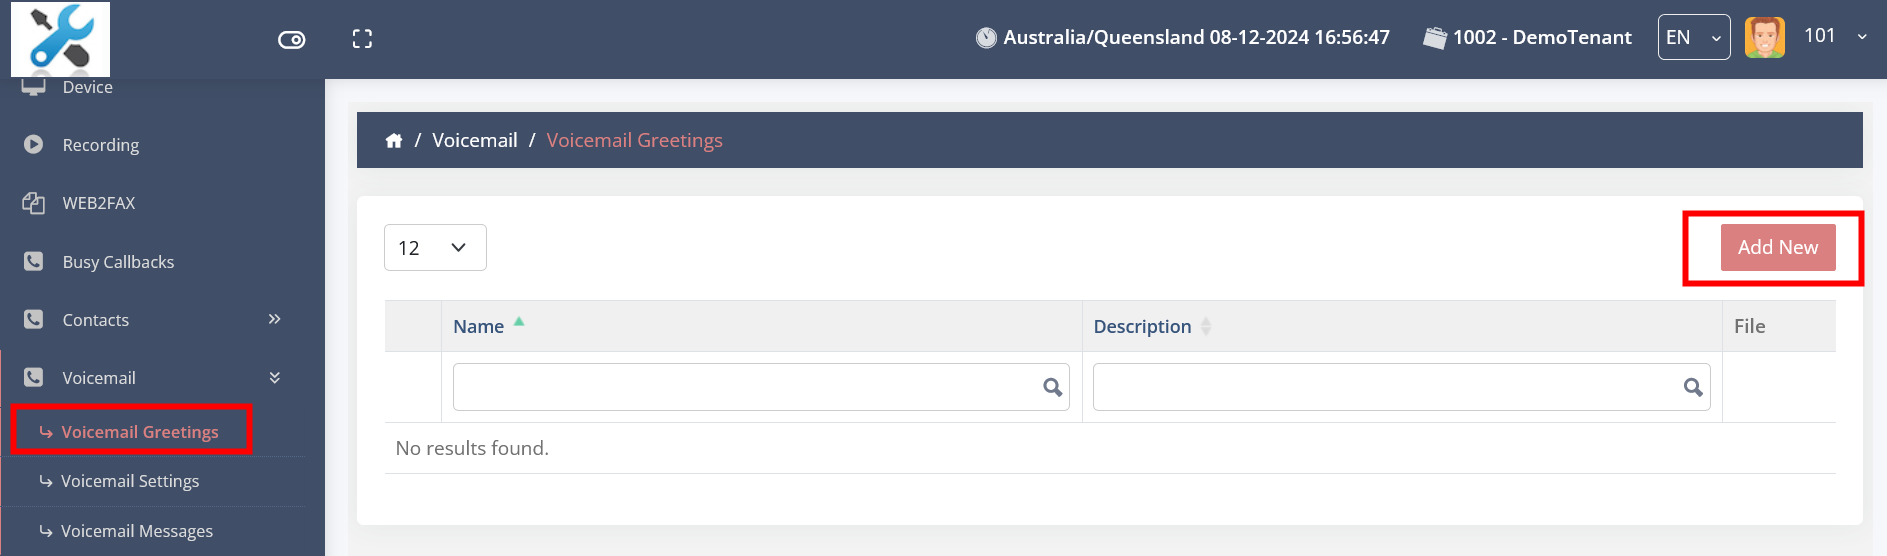
Click on VOICEMAIL - VOICEMAIL GREETING
Upload/add a file with your voicemail greeting
3. Then click on VOICEMAIL SETTINGS on your left
Setup you parameters in the first section (usually they are as follows):
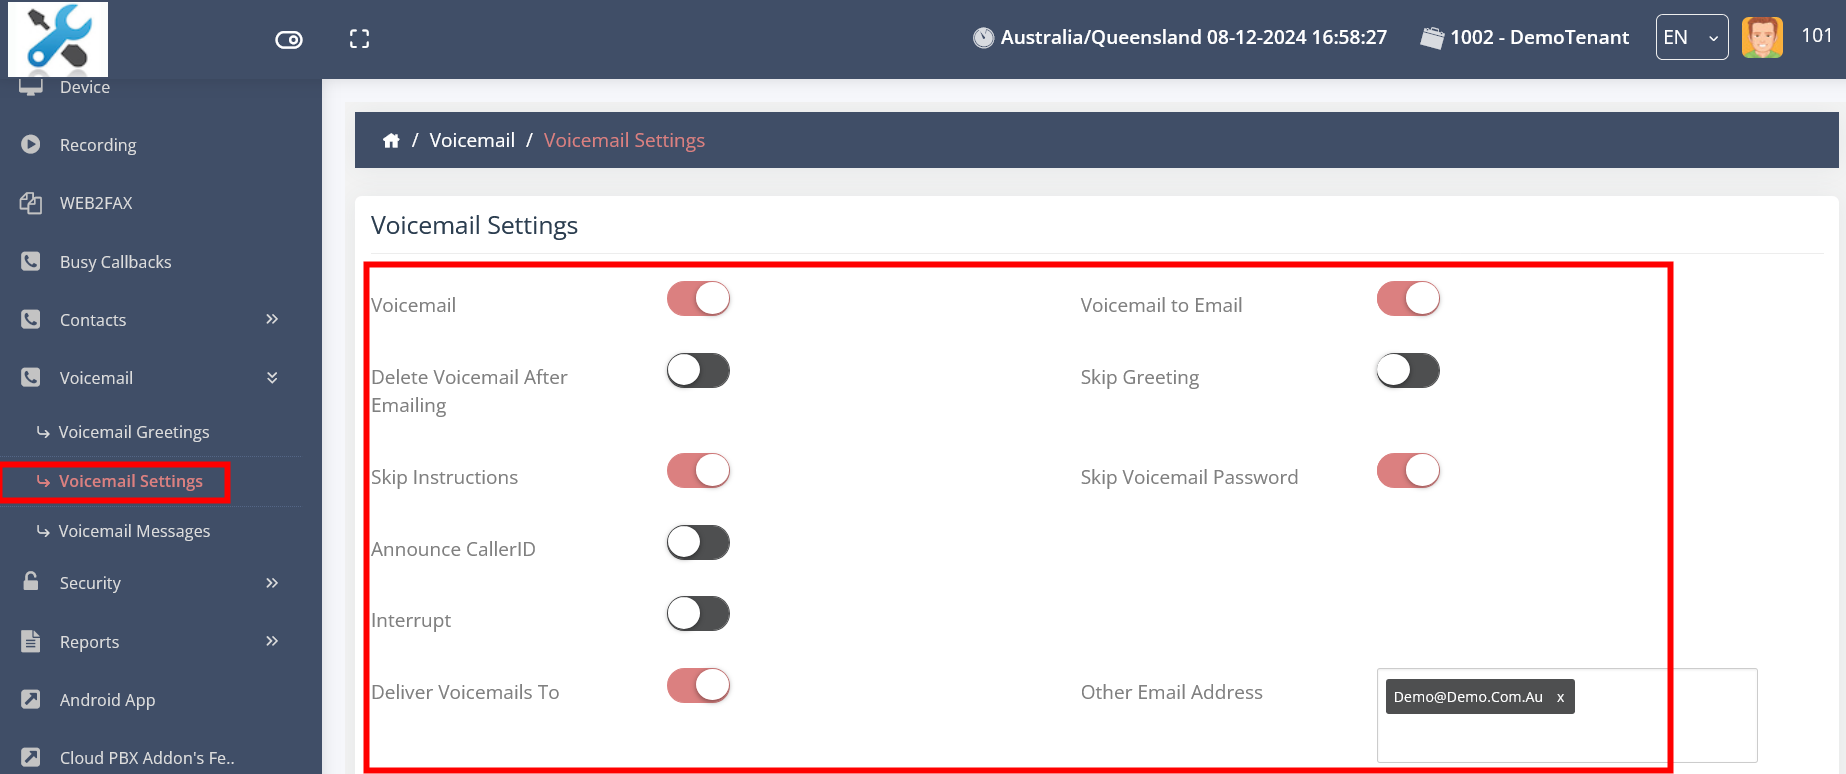
Voicemail - ON
Voicemail to Email - ON
Delete Voicemail After Emailing - OFF
Skip Greeting - OFF
Skip Instructions - ON
Skip Voicemail Password - ON
Announce CallerID - OFF
Interrupt - OFF
Deliver Voicemails To - ON
Other Email Address - add any emails to reveive the voicemail via email