How to setup Holidays in the Cloud PBX
This feature is useful for when your company closes for a Public Holiday. It can also be setup on extensions directly if you have a direct phone number and you go on Holidays.
To setup from scratch for a company (whole PBX) follow these steps:
(if already public holidays are already setup and just want to add or delete holidays, then just follow from step 2)
STEP 1
- Login into the Cloud PBX
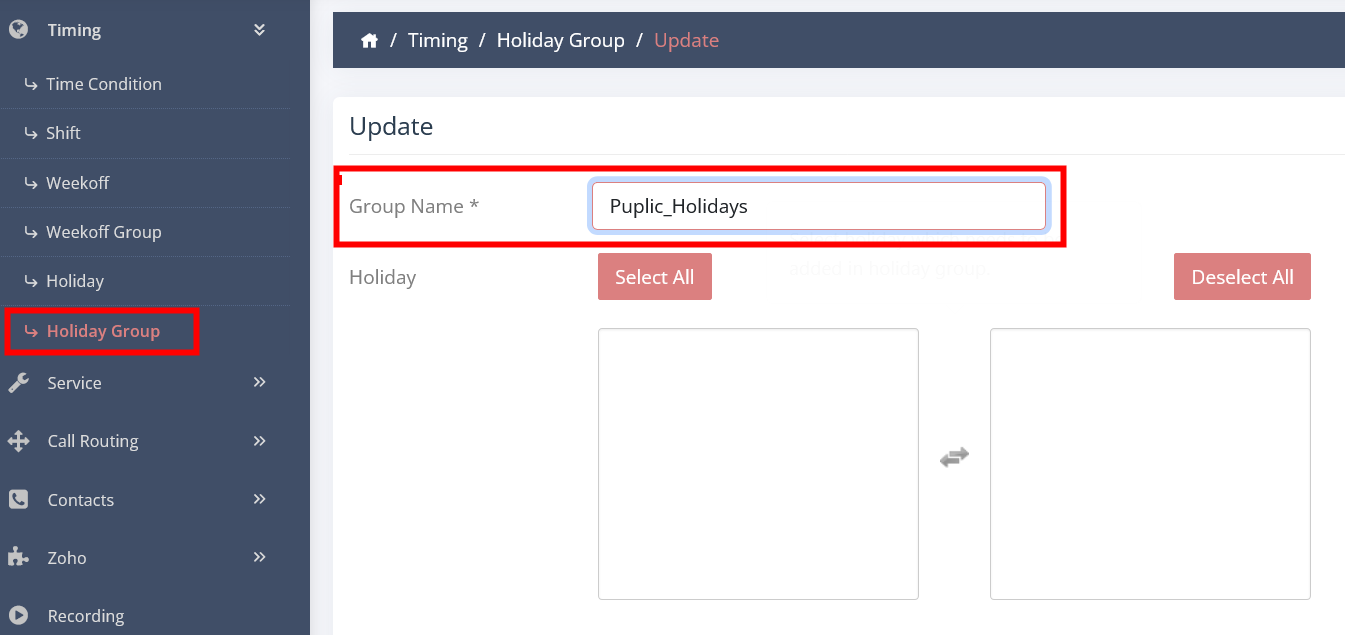
- Click on TIMING
- Click on HOLIDAY GROUP and create a group first (let's call it Public Holidays)
STEP 2
- Click on HOLIDAY
- Click on ADD NEW
- Enter a day or days of the holidays and all info of the group
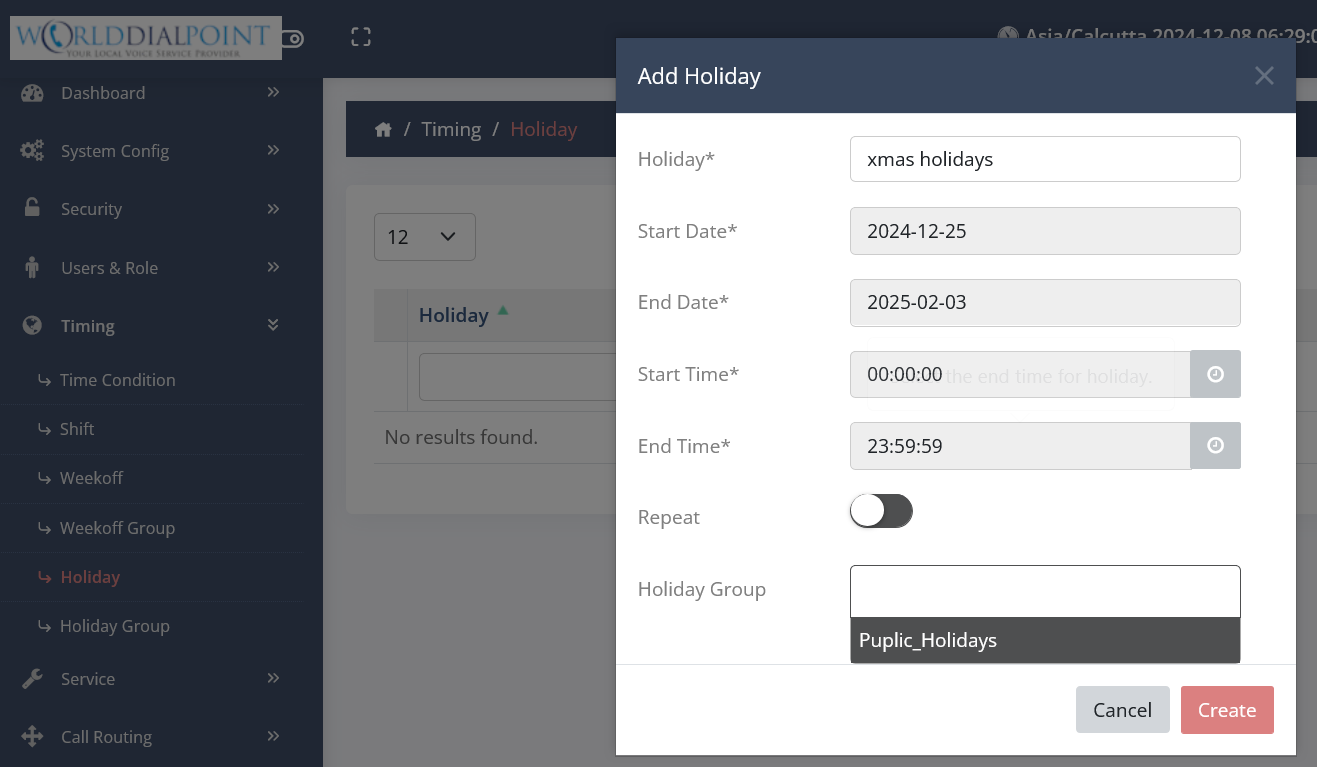
- CREATE
- Repeat this step to add more holidays
STEP 3
Linking the holidays to phone number/s
- Click on CALL ROUTING
- Click on DID ROUTING
- Edit a Phone number

- Go down to the HOLIDAY CONFIGURATION SECTION
- Setup what you want to do (Activate) ALLOW HOLIDAY
- HOLIDAY GROUP (Choose the holiday group you created)
- Select the HOLIDAY DESTINATION
- Select the HOLIDAY EXTENSION
- Click UPDATE

All done. Now when the days you entered in STEP 2 are active, it will follow the rules in step 2 and 3.
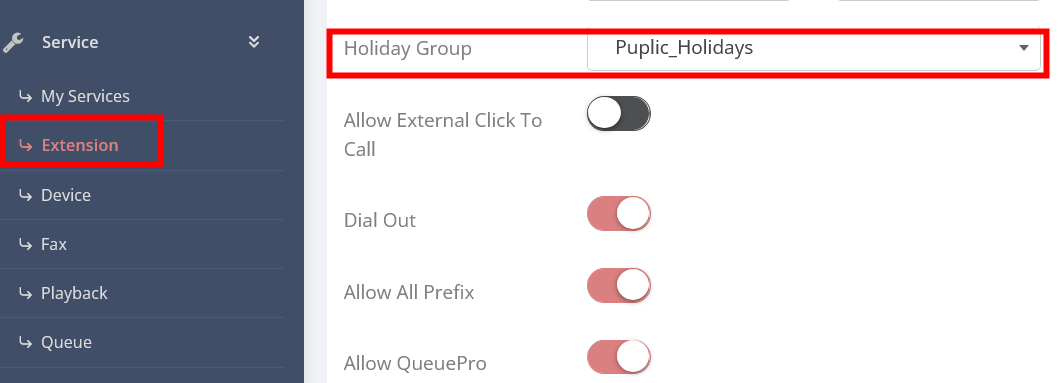
If extension/s do not want nobody calling them. You can also link the above step to to the extension/s of your choice. Just click on SERVICE - EXTENSION - EDIT EXTENSION of your choice and scroll down to the HOLIDAY Section to configure.
PS - You can also create multiple Holiday Groups to suite your needs and lastly also you can setup the HOLIDAY configuration per CID by click on CALL ROUTING - CID ROUTING
ENJOY
