How to Auto Provision Yealink Phones within the CLOUD PBX
(BASIC LINE SETUP that includes Line / Codes / Phone Book / DND )
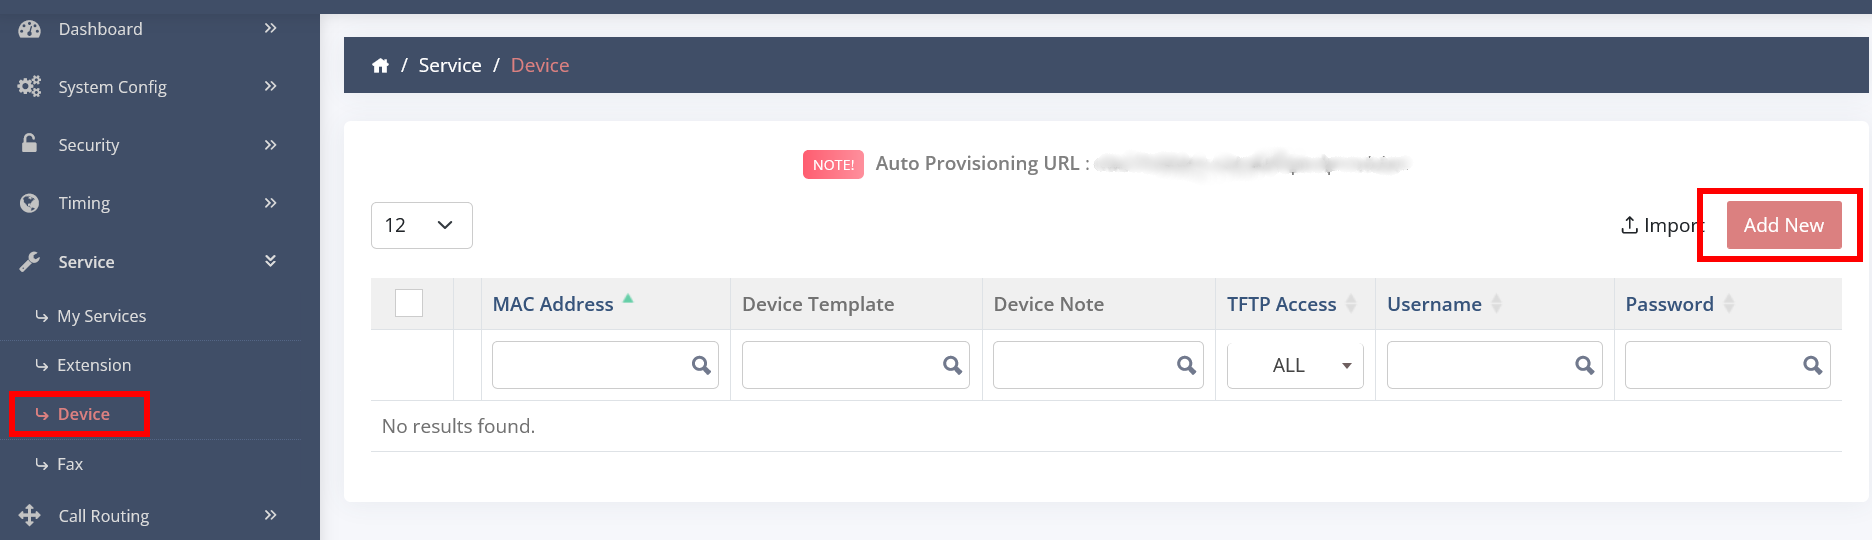
Login into your CLOUD PBX
Click on SERVICE - DEVICE - ADD DEVICE
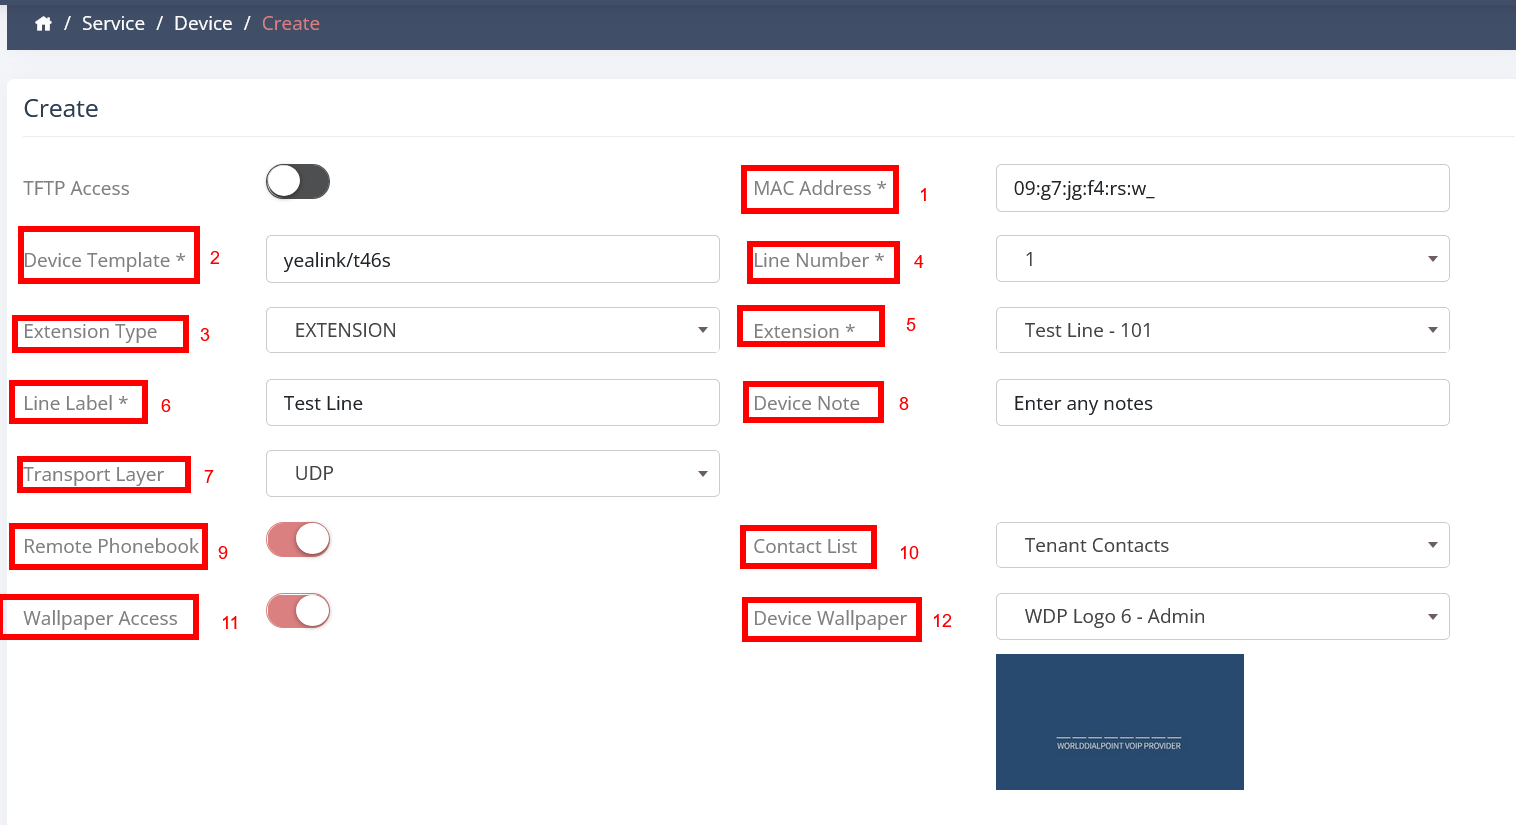
Then follow this screenshot
Enter MAC
Type the model of yealink phone (eg t48s)
Extension Type - Extension
Line Number - 1
ect....
Once all filled click CREATE
On that page you will see a link on top (copy as you will need it to setup the Yealink phone)
Now goto to your Yealink phone and login via the browser
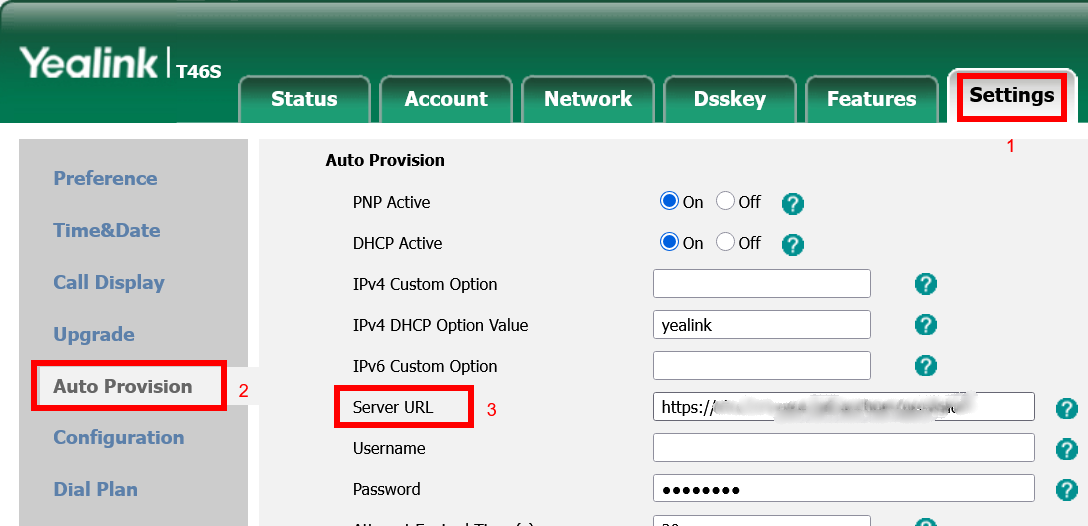
Click on SETTINGS- AUTO PROVISION
Look for SERVER URL and enter the link you coppied in https (eg. https://link with no spaces)
Click on CONFIRM
REBOOT phone and you should be done.
PS - Once the phone is connected than what is left is setup the BLF buttons either manual or using the auto provision if needed, otherwise you are ready to make and receive calls.
